Create a New Meta Layer and Write a Hello World Recipe in Yocto Project.
In this tutorial, you will learn how to create a new meta-layer and how to write a new hello world bitbake recipe in the Yocto Project. We will build the image with the hello recipe for QEMU and verify this package present in the rootfs.
1-Create a new meta layer and add it to bblayer.conf file
- Yocto provides a tool that can create the meta-layer and maintain the directory structure which Yocto Project supports.
- Run the below command to create a new layer.
$ cd poky
$ source oe-init-build-env
# Now, build folder would your current working directory.

$ bitbake-layers create-layer ../meta-tutorial
# This command creates the meta-tutorial layer inside the poky directory.

# Add this layer into bblayer.conf file
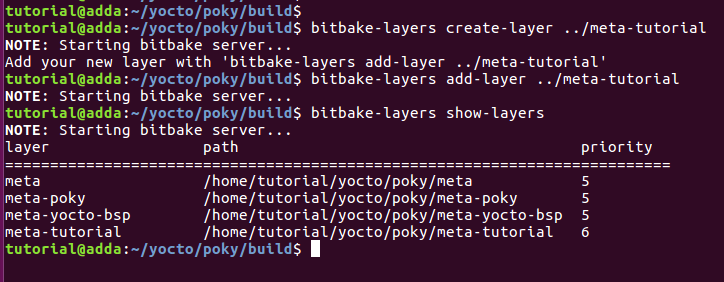
$ bitbake-layers add-layer ../meta-tutorial

# Display all layer present in the bblayer.conf file.
$ bitbake-layers show-layers
2-Create Directory For Recipe and Source Files
- Our meta tutorial layer directory structure looks like this.
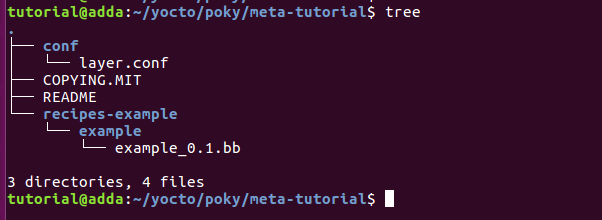
- We need to create a hello and files directory at the below location.
- poky/meta-tutorial/recipe-example/hello
- poky/meta-tutorial/recipe-example/hello/files/
3-Write the simple hello world c program
Create the hello.c file at the poky/meta-tutorial/recipe-example/hello/files/hello.c
//Simple Hello World Program
#include<stdio.h>
int main() {
printf("Hello World , Created Bitbake recipe successfully\n");
return 0;
}
4-Write the simple hello recipe file
Create hello_1.0.bb recipe file at the poky/meta-tutorial/recipe-example/hello/hello_1.0.bb
DESCRIPTION = "Simple helloworld application"
LICENSE = "MIT"
LIC_FILES_CHKSUM = "file://${COMMON_LICENSE_DIR}/MIT;md5=0835ade698e0bcf8506ecda2f7b4f302"

SRC_URI = "file://hello.c"

S = "${WORKDIR}"

do_compile() {
        ${CC} hello.c ${LDFLAGS} -o hello
}

do_install() {
        install -d ${D}${bindir}
        install -m 0755 hello ${D}${bindir}
}
Reference: Hello recipe
- This hello recipe fetch the source file( hello.c) using the SRC_URI variable and do_compile used to compile the hello.c source file and generated the hello binary.
- do_install function install hello binary at the /usr/bin of the target rootfs.
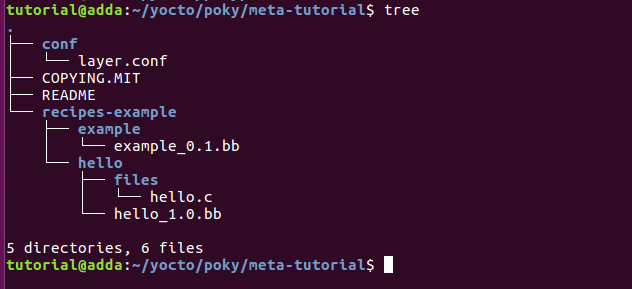
- Now, the latest directory looks like this.
5-Select machine configuration and Add hello package to rootsfs
We are building an image for machine QEMUx86-64 so we have to add this machine in conf/local.conf file.
#By default, this machine selection is enabled.
MACHINE ??= "qemux86-64"

#We need to add the hello software package to the target image
IMAGE_INSTALL_append = " hello"

6-Build Image
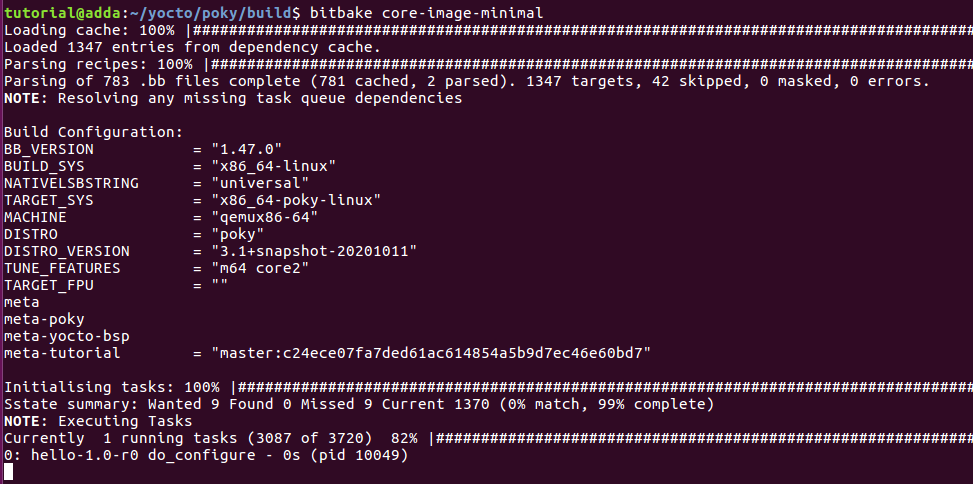
Run bitbake to build the minimal boot image for QEMU.
$bitbake core-minimal-image
7-Run the QEMU image and verify the installed Package
Use the below command to run the QEMU image on Your host PC.
$runqemu qemux86-64
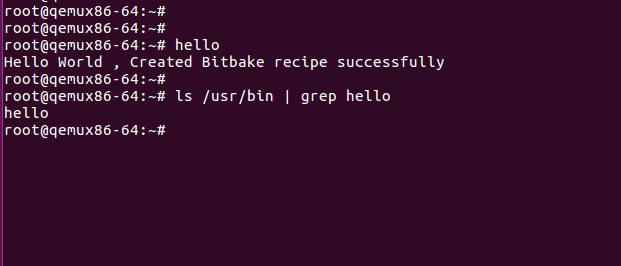
We installed the hello package at /usr/bin so run hello from the terminal and it gives the output.
