Build Linux Image for Raspberry Pi board using Yocto Project
Raspberry pi is a very popular development board for IoT and Industrial projects.it comes in many different versions like Raspberry pi 4, Raspberry Pi 3, and Raspberry 2, etc. Yocto is an open-source project which provides a build framework and metadata to help to create a custom image for your target board also it supports the raspberry pi BSP layer.
Follow the below steps to build the image for your Raspberry pi board using Yocto Project.
- Prerequisite
- Download Poky
- Download Raspberry pi meta layer
- Setup build environment
- Set machine name in local.conf and add raspberrypi layer in bblayer.conf
- Start bitbake to build the image
- Flash SD card
- Boot
Prerequisite
Need Ubuntu-based Host system with a minimum 50 GB free space with internet connection.
Install the below package on the host machine which supports the Yocto Project.
# Install the below required package on your host machine
sudo apt-get install gawk wget git-core diffstat unzip texinfo gcc-multilib build-essential chrpath socat cpio python python3 python3-pip python3-pexpect xz-utils debianutils iputils-ping libsdl1.2-dev xterm
Download Poky
Poky is the Yocto reference distribution.it contains all the basic meta layers
Every 6 months, Yocto Project releases a new version of poky. so we clone dunfell latest stable version of poky.
# Clone the poky with the below command.
$ git clone git://git.yoctoproject.org/poky -b dunfell

Download Raspberry pi meta layer
You will need a BSP layer to support the Raspberry Pi boards. so Yocto Project is providing a meta-raspberrypi layer that contains information related to raspberry pi boards that are required during the build.
Download meta-raspberrypi layer from the poky directory
$ cd poky

# clone raspberrypi layer using below command
$ git clone https://git.yoctoproject.org/meta-raspberrypi/ -b dunfell

Setup build environment
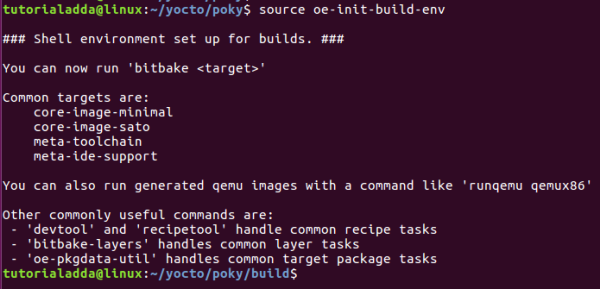
initialize the oe-init-build-env script with the below command from the poky directory and it will auto-create the build directory. Now your current working directory would be the build directory.
# Setup the environment
$source oe-init-build-env

Set machine name in local.conf and add the raspberry pi layer in bblayer.conf
local.conf file is used for user configuration and we are building the image for raspberry pi 4 (64-bit variants) then machine name should raspberrypi4-64 and comment other machine names in local.conf
You can set machine name based on your raspberry pi boards
Example:
For raspberry pi 3
machine ?= "raspberrypi3"
For raspberry pi 2
machine ?= "raspberrypi2"
To generate an SD card image file, we need to set the IMAGE_FSTYPE variable.
# For raspberry pi 4 machine name
machine ?= " raspberrr4-64"

# For SD card image
MAGE_FSTYPES = "tar.xz ext3 rpi-sdimg"

Now, We have to add the meta-raspberrypi layer in the build/conf/bblayers.conf file. This file store information of all meta-layer path which used by the bitbake
In my case meta-raspberrypi layer path is /home/tutorialadda/yocto/poky/meta-raspberrypi

Start bitbake to build the image
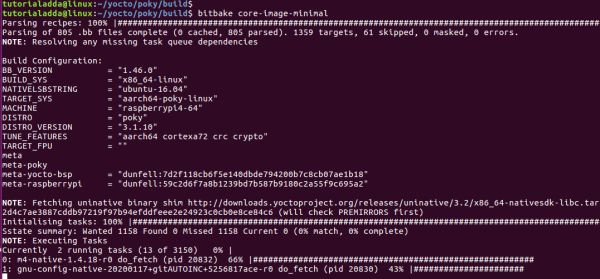
We are ready to start the bitbake to build the image.core-minimal-image recipe provides the minimal bootable image for the Raspberry pi boards.
Bitbake will take several hours to complete the build process. it depends on your internet speed and CPU performance.
Generated image present at the tmp/deploy/images/raspberrypi4-64/ directory.
# Run bitbake
$ bitbake core-image-minimal

Flash SD card
After completing the build process bitbake will generate the core-image-minimal-raspberrypi4-64.rpi-sdimg file at tmp/deploy/images/raspberrypi4-64/ directory
Now just plug the SD card into your host machine and follow the below steps
To check the SD card partition run sudo fdisk -l and replace x with your sd card partition id.
$ sudo umount /dev/sdx

# Flash SD card with the generated image
$ sudo dd if=tmp/deploy/images/raspberrypi4-64/core-image-minimal-raspberrypi4-64.rpi-sdimg of=/dev/sdx

$ sudo umount /dev/sdx
Boot
Insert SD card into raspberry pi and start on the board.
root is the username and password is not required