First Yocto Project Build For QEMU (Quick Emulator).
In this tutorial, you will learn how to set up a host system for Yocto Project development and what are the basic steps to generate an image for QEMU (Quick Emulator).
You don’t require any extra hardware for the QEMU emulator build. You need to verify the build by running the QEMU emulator on the host system only.
Yocto Project setup and Build steps:
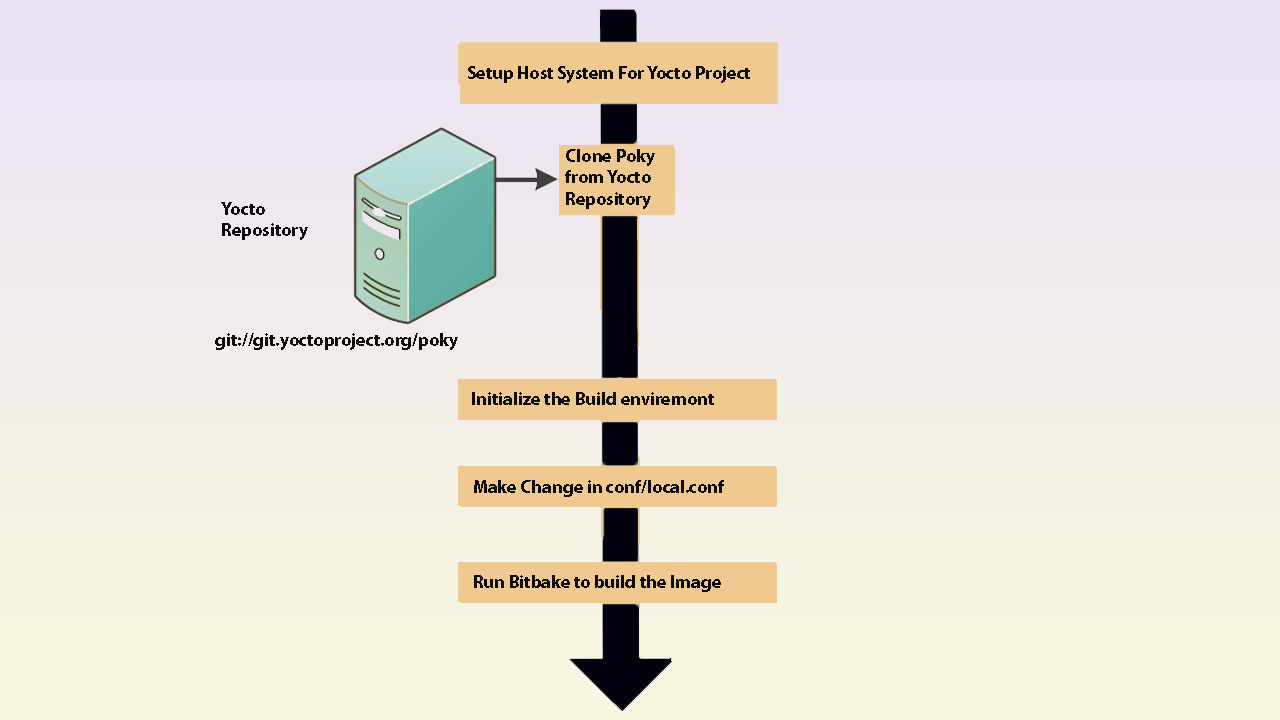
There are below steps to create custom Linux for the target board using the Yocto Project. we will build the image for QEMU and verify it on host system.
- Pre-requirement
- Download Poky
- Build environment setup
- Variable configuration in conf/local.conf
- Launch Yocto build system (Bitbake)
- Run qemux86-64 image
Pre-Requirement
To support the Yocto Project build process, you need to follow the below points.
- It is recommended to host system should be Ubuntu version 14.04 LTS or Later.
- At least a minimum of 50 GB free left in your system.
- Internet connection required to download the packages on local disk and reuse for the later build process.
- The host system required some packages to support Yocto Project development. It depends on your Linux Distribution.
- Run the below command to install the required packages on the host system.
On Ubuntu Host system:
sudo apt-get install gawk wget git-core diffstat unzip texinfo gcc-multilib build-essential chrpath socat cpio python python3 python3-pip python3-pexpect xz-utils debianutils iputils-ping libsdl1.2-dev xterm
Download Poky
Now your Build host is ready and you need to download poky form Yocto project repository. it is always recommended to use the latest version of poky.
clone the poky from the below link.
$ git clone git://git.yoctoproject.org/poky

Poky downloading from remote repository
Build Environment Setup
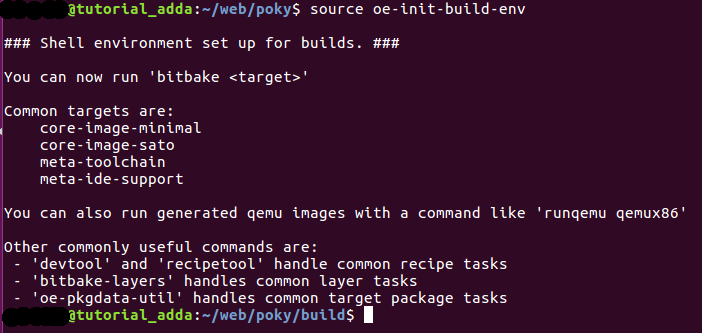
Run the "oe-init-build-env" script to initialize the built environment and it creates the build directory in the poky folder.
- Go inside the Poky directory and run the below command
- This command creates a build directory inside the poky and it would be your current working directory.
$ source oe-init-build-env

Variable Configuration in conf/local.conf
After setup the build environment, this file is auto-created and it is a user-based configuration for the Yocto build system.
- In the build directory, another subdirectory conf is created which consists of two configuration files bblayer.conf and local.conf
- This time we need to look into the local.conf which is the user based configuration file for the Yocto build system.
- For QEMU emulator, by default machine variable is set to qemux86-64 and comment on all other MACHINE variables if not
#Open local.conf file and add/remove configuration based on your requirement
$ vim conf/local.conf

#For QEMU emulator, the machine variable should qemux86-64
MACHINE ??= “qemux86-64”

Machine variable setup
Launch Yocto Build System (Bitbake)
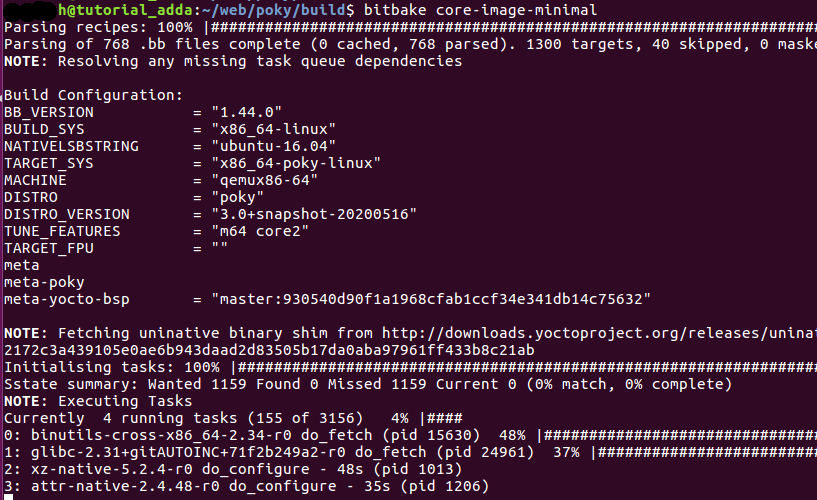
Launch the Bitbake from build directory. it is the task executer in Yocto Project.
- Always Run the bitbake from the build directory.
- core-image-minimal provides a very basic console type bootable image.
- Run below command to lunch the bitbake.
$ bitbake core-image-minimal

Running the bitbake
Note: It took several hours to complete. it depends on the number of CPU cores and internet speed.
Run qemux86-64 image
After completing the build process, it generates the image for your target board.
- Verifies the QEMU Image Run below command.
$ runqemu qemux86-64
